
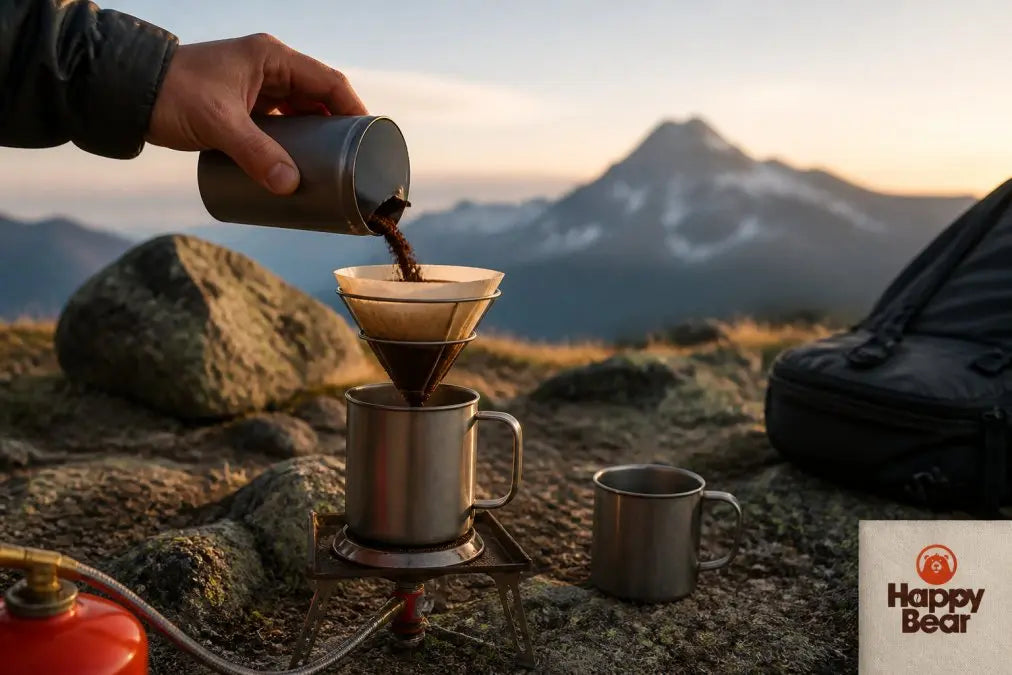
How to Make Coffee While Backpacking
Table of Contents
- Why Coffee Matters on the Trail
- Best Coffee for Backpacking
- Lightweight Coffee Makers for Camping
- How to Make Coffee While Backpacking: Step-by-Step
- Cowboy Coffee Method and No-Gear Brewing
- Coffee-to-Water Ratios and Extraction
- Managing Altitude and Water Temperature
- Coffee Grounds Disposal and Leave No Trace
- Common Mistakes to Avoid
- Ultralight Weight vs. Convenience Trade-Offs
- Frequently Asked Questions
Last Updated: September 27, 2026
Why Coffee Matters on the Trail
Coffee isn't just a morning ritual when you're backpacking, it's a morale booster, a warming ritual on cold mornings, and sometimes the only familiar comfort in an unfamiliar environment. Learning how to make coffee while backpacking transforms your outdoor experience from survival mode into something genuinely enjoyable. At Happy Bear Coffee, we believe a quality cup of coffee in the backcountry tastes better than anything you brew at home.

The challenge isn't whether you should bring coffee, it's figuring out which method fits your hiking style. Weight matters. Cleanup matters. Fuel efficiency matters. And the actual flavor of your coffee matters too, especially when you're miles from civilization. The right brewing approach balances all these factors without turning your morning into a frustrating chore.
Best Coffee for Backpacking
Not all coffee works equally well in the backcountry. The grind size, roast level, and freshness of your beans directly impact extraction and flavor when you're working with limited equipment and water quality.
Coarse-ground coffee works best for most backpacking methods because it resists over-extraction and produces less sediment and sludge in your cup. Fine grounds, which work beautifully in espresso machines at home, create bitter, muddy coffee when you're using immersion or pour-over techniques with limited control. Medium-coarse grind hits the sweet spot for most hikers.
Single-origin beans from Happy Bear Coffee's collection offer complexity that survives the brewing process, even when conditions aren't ideal. A quality medium roast maintains body and sweetness better than lighter roasts when water temperature fluctuates at altitude. Dark roasts are forgiving, they're harder to over-extract, but they sacrifice the nuanced flavors that make backpacking coffee worth the effort.
Pre-ground coffee is heavier and goes stale faster, but it eliminates the need to carry a grinder. Whole beans stay fresh longer and weigh only slightly more. If you're on a multi-week trip, whole beans are the better choice. For weekend trips, pre-ground coffee from a specialty roaster saves weight and complexity.
Lightweight Coffee Makers for Camping
The method you choose determines everything: weight, cleanup, brew time, flavor, and how much gear you need to carry. Each approach trades off different factors.
French Press for Backcountry Brewing
A French press delivers full immersion brewing, which means maximum flavor extraction and body in your cup. The Happy Bear Coffee Travel Coffee Press, OVRLNDR® model, is built with high-quality stainless steel and features a double-walled, vacuum-insulated design that ensures your coffee stays hot for hours. The innovative Bru-Stop™ plunger prevents over-extraction, which is crucial when you're brewing in variable conditions.
The French press method is straightforward: add coarse grounds, pour hot water, wait 4 minutes, press, and drink. Cleanup requires rinsing out grounds, which means you're managing coffee sediment in the backcountry. The removable base on the OVRLNDR® makes this easier than traditional models.
The tradeoff is weight. A French press is heavier than pour-over alternatives, and you're carrying a glass or metal vessel that takes up pack space. For car camping or base camp situations, this isn't a problem. For ultralight thru-hiking, it's worth considering.
Pour-Over Techniques and Setup
Pour-over brewing gives you control over extraction by managing water temperature and pour rate. The Collapsible Pour Over Coffee Maker from Happy Bear Coffee weighs just 6.5 ounces and collapses flat for packing, making it one of the lightest options available. It includes two reusable CoffeeSock filters, eliminating the need to carry disposable paper filters.

The pour-over method requires a mug or pot underneath, hot water just off boiling, and coarse-to-medium-coarse grounds. You pour slowly in circular motions to ensure even saturation and extraction. This gives you more control over brew strength than immersion methods, and the process typically takes 3-4 minutes.
Cleanup is minimal, rinse the grounds into a cathole or pack them out, then rinse the dripper. The reusable filter eliminates trash, which aligns with leave no trace principles. Pour-over is ideal for hikers who want lightweight gear and manageable cleanup without sacrificing flavor.
AeroPress and Instant Options
An AeroPress is compact, durable, and produces excellent coffee through immersion and pressure. It weighs around 4 ounces and fits easily in a backpack. The downside is that it requires a small paper filter (or you can use a reusable metal filter), and the brewing process involves more steps than pour-over or cowboy methods.
Instant coffee from Happy Bear Coffee's POURTA™ single-serve brew bags offers a fast, light option. Each brew bag contains precision-ground, small-batch roasted coffee with optimal grind size for full immersion. You simply add hot water and steep for 3-4 minutes, then drink. No equipment needed beyond a mug. The bags are compostable.
Instant coffee has improved dramatically over the past decade. Quality instant options deliver genuine coffee flavor without the bitterness that plagued earlier versions. For ultralight hikers or those prioritizing speed and simplicity, POURTA brew bags eliminate the equipment question entirely.
How to Make Coffee While Backpacking: Step-by-Step
The process changes slightly depending on your method, but the fundamental steps remain consistent. Here's how to brew coffee in the backcountry using a pour-over setup, which balances weight, control, and cleanup.
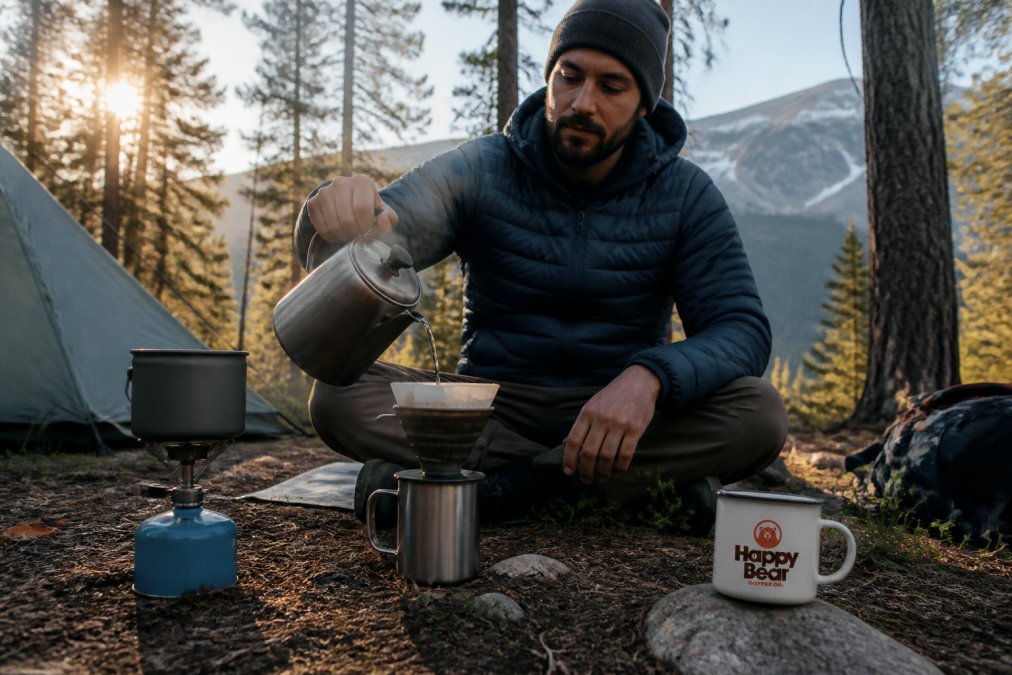
Step 1: Prepare Your Water
Boil water using your camp stove or fire. For pour-over and French press brewing, water should be just off boiling, around 200°F. Boiling water (212°F) extracts too quickly and can scald the grounds, creating bitterness.
If you're at altitude, water boils at a lower temperature, which affects extraction. At 8,000 feet, water boils around 197°F, which is actually ideal for coffee brewing. At higher elevations, expect slightly longer brew times and potentially weaker extraction.
The water quality matters. If you're using filtered or treated water from a stream, sediment or mineral content affects flavor. Carry a lightweight water filter if you're concerned about taste and safety. Some hikers use a simple cloth filter to remove visible particles from backcountry water sources.
Step 2: Measure Coffee and Water Ratio
Use a standard ratio of 1 part coffee to 16 parts water by weight. If you don't have a scale, use the "finger method": place your finger in the mug touching the bottom, add grounds until they reach your first knuckle, then add water until it reaches your second knuckle. This approximates the correct ratio.
For a 12-ounce mug, you'll need about 0.75 ounces (roughly 3-4 tablespoons) of coarse-ground coffee. Pre-portion your coffee into small bags or containers before your trip to eliminate measuring in the field.
Step 3: Brew Using Your Chosen Method
For pour-over: Place the dripper over your mug, add a filter, rinse it with a small amount of hot water, then add grounds. Pour hot water slowly in a circular motion, starting with a small amount to "bloom" the grounds for 30 seconds. This allows CO2 to escape and improves extraction. Then pour the remaining water slowly over 2-3 minutes.
For French press: Add grounds to the pot, pour hot water, stir gently, and let steep for 4 minutes. Press the plunger down slowly and steadily. Pour immediately to avoid over-extraction.
For cowboy coffee: Add grounds directly to hot water in a pot, stir, let settle for 2-3 minutes, then pour carefully into your mug, leaving grounds at the bottom.
Step 4: Pour and Enjoy
Pour your coffee into your mug or cup, leaving sediment at the bottom of the brewing vessel. Take a moment to appreciate the ritual, this is one of the genuine pleasures of backcountry travel.
Cowboy Coffee Method and No-Gear Brewing
Cowboy coffee requires zero equipment beyond a pot and a mug. This is the simplest method to make coffee while backpacking when you've left your specialized gear behind or want to minimize weight.
Add coarse grounds directly to boiling water in a pot, roughly 1 part grounds to 16 parts water. Stir once, then let the grounds settle for 2-3 minutes. Pour slowly into your mug, leaving the settled grounds at the bottom of the pot.
The downside is sediment. You'll get fine particles in your cup unless you pour very carefully. Some hikers add a pinch of cold water to the pot after brewing, which helps grounds settle faster and more completely. This technique is called "knocking down" the grounds.
Cowboy coffee works best with medium or dark roast beans, which have less soluble material and produce less fine sediment. Light roasts create muddier cups with this method.
The advantage is weight and simplicity. You need nothing but a pot and a way to heat water. For minimalist backpackers or emergency situations, this method delivers drinkable coffee in minutes.
Coffee-to-Water Ratios and Extraction
The coffee-to-water ratio directly determines brew strength and extraction quality. Too little coffee produces weak, sour coffee because under-extraction leaves acids in the cup. Too much coffee creates bitter, over-extracted coffee.
Travel Coffee Press – OVRLNDR® →
The standard ratio across all brewing methods is 1:16 (coffee to water by weight). This produces a balanced cup with full body and clean finish. Some people prefer stronger coffee at 1:15 or weaker coffee at 1:17, but 1:16 is the starting point.
Grind size affects how quickly water extracts soluble compounds from the grounds. Coarse grounds slow extraction, which means you need longer steep times (4+ minutes for French press). Fine grounds speed extraction, which works for pour-over (3-4 minutes) where you control water flow. Medium-coarse grind is the safest choice for backcountry brewing because it works across multiple methods and resists over-extraction even when conditions aren't perfect.
Water temperature also affects extraction speed. Hotter water extracts faster. At lower temperatures, you need longer brew times. This is why altitude matters, cooler boiling water means slower extraction, so you should extend brew time by 30-60 seconds at high elevations.
Managing Altitude and Water Temperature
Water boils at lower temperatures as elevation increases, which directly impacts coffee extraction. At sea level, water boils at 212°F. At 5,000 feet, it boils around 203°F. At 10,000 feet, it boils around 194°F.
Lower water temperature means slower extraction. Your coffee will taste slightly weaker and potentially more sour because the water isn't hot enough to fully dissolve all the flavorful compounds. Compensate by extending brew time by 30-60 seconds at high altitude, or use a slightly finer grind to increase surface area.
If you're brewing at very high altitude (above 10,000 feet), consider using slightly hotter water relative to boiling point. Some hikers use a thermometer, but most simply pour water immediately after it boils rather than waiting for it to cool slightly.
The mineral content of water also changes extraction. Hard water (high in calcium and magnesium) extracts differently than soft water. Backcountry water sources vary widely. If you notice your coffee tastes off, it's often the water, not your technique.
Coffee Grounds Disposal and Leave No Trace
Proper grounds disposal is essential for leave no trace principles. Never leave used grounds at your campsite or pour them into water sources.
Scatter grounds in a cathole at least 200 feet from water sources, trails, and camp. Spread them over a wide area so they decompose naturally. Coffee grounds are organic matter and break down relatively quickly, but concentrated piles can attract animals.
For trips where you're moving camp daily, pack out grounds in a small bag or container. This adds minimal weight and eliminates the need to find a suitable cathole location. Some hikers use the grounds as a natural deodorizer in their pack.
Paper or cloth filters are compostable and can be buried in a cathole or packed out. Avoid bleached white filters when possible, unbleached brown filters are more environmentally friendly. The Collapsible Pour Over from Happy Bear Coffee includes reusable CoffeeSock filters, which eliminate the filter disposal question.
Metal filters from an AeroPress are reusable and produce no waste. Rinse them thoroughly and pack them out dry to prevent odor issues.
Common Mistakes to Avoid
Most backpacking coffee problems stem from a few predictable mistakes. Recognizing these patterns helps you troubleshoot in the field.
Using water that's too hot. Boiling water (212°F) over-extracts coffee, creating bitter, harsh flavors. Let water cool for 30-60 seconds after boiling before pouring. This is especially important at sea level where water boils hottest.
Grinding coffee too fine. Fine grounds over-extract quickly, especially with immersion methods. Coarse or medium-coarse grind is safer for backcountry brewing where you have limited control over variables.
Steeping too long. French press brewing for longer than 4 minutes creates over-extracted, bitter coffee. Set a mental timer or count slowly to avoid this common mistake.
Using stale coffee. Pre-ground coffee loses flavor within 2 weeks. Whole beans stay fresh 4-6 weeks after roasting. Buy fresh-roasted beans timed to your trip, not weeks in advance.
Not accounting for altitude. Water boils cooler at elevation, which slows extraction. Extend brew time by 30-60 seconds above 5,000 feet, or your coffee will taste weak and sour.
Inconsistent water-to-coffee ratio. Measuring by eye produces inconsistent results. Pre-portion your coffee into individual bags before your trip, or use a simple scale if weight allows.
Poor water quality. Sediment, mineral content, or contamination from water sources affects flavor. Use a lightweight water filter or treat water properly before brewing.
Ultralight Weight vs. Convenience Trade-Offs
Choosing a brewing method means accepting specific trade-offs. Understanding these trade-offs helps you pick the right approach for your trip style.
Cowboy coffee (0 ounces of gear): Requires zero equipment, fastest brewing, minimal cleanup. Downside: sediment in cup, harder to control strength, less refined flavor. Best for minimalist backpackers and emergency situations.
Instant coffee (less than 1 ounce per bag): Lightest option, no equipment needed, fastest brewing, zero cleanup. Downside: less complex flavor than freshly brewed, requires carrying multiple bags for multi-day trips. Best for ultralight hikers and those prioritizing speed.
Pour-over (6-8 ounces): Lightweight, excellent flavor control, manageable cleanup, produces clean cup. Requires a mug underneath, slightly longer brew time. Best for hikers balancing weight and quality.
French press (12+ ounces): Excellent full-bodied coffee, immersion brewing, simple process. Heavy relative to alternatives, more sediment, requires rinsing grounds. Best for car camping or base camp situations.
AeroPress (4 ounces): Compact, durable, excellent coffee, pressure brewing. Requires paper filters (or reusable metal), more complex process, medium cleanup. Best for hikers willing to carry a small amount of extra weight for superior coffee.
For a typical backpacking trip, the Collapsible Pour Over from Happy Bear Coffee represents the best balance of weight, flavor, and practicality. At 6.5 ounces, it's light enough for ultralight hikers, produces genuinely excellent coffee, and the reusable filters eliminate waste and weight concerns.
Making coffee while backpacking transforms your relationship with mornings in the wilderness. The ritual itself, heating water, measuring grounds, waiting for extraction, becomes part of the adventure rather than a chore. The right brewing method, matched to your trip style and weight priorities, ensures that coffee becomes a genuine highlight of your days on the trail.
Happy Bear Coffee's curated collection of specialty beans and lightweight brewing equipment is designed for those who refuse to compromise on quality. Whether you're carrying a French press to base camp or brewing POURTA single-serve bags on a thru-hike, fresh coffee from sustainably sourced beans elevates every morning in the backcountry. Explore our camping and travel gear collection to find the brewing setup that matches your adventure style.
Frequently Asked Questions
What is the best way to make coffee while backpacking?
The best method depends on weight and convenience priorities. Pour-over systems like the BruTrek® Collapsible Pour Over offer excellent extraction in a lightweight 6.5 oz package. French presses like the OVRLNDR® Travel Coffee Press deliver richer flavor with immersion brewing. For ultralight trips, instant coffee or brew bags provide simplicity. Use a 1:15 to 1:17 coffee-to-water ratio by weight, brew time of 3-4 minutes, and coarse grounds to minimize sediment.
What is good coffee for backpacking?
Single-origin specialty beans with medium roasts balance flavor. Look for beans roasted specifically for your brewing method, coarser grinds for French press, medium for pour-over. Happy Bear Coffee's sustainably sourced varieties work well on the trail. For maximum freshness and minimal weight, bring whole beans if you have a grinder, or pre-ground in an airtight bag. Avoid finely ground espresso blends, which create excessive sediment and sludge in immersion methods.
How does altitude affect coffee brewing while backpacking?
Water boils at lower temperatures at higher elevations, roughly 2°F lower for every 1,000 feet gained. This reduces solubility of coffee compounds, requiring longer brew times (add 30-60 seconds) or slightly hotter water just off boil. Use a coarser grind to slow extraction if water cools quickly. Bloom your grounds for 30 seconds before full immersion to improve extraction efficiency.
Is instant coffee the only practical option for long-distance backpacking?
No. While instant coffee is lightweight and convenient, modern brew bags and collapsible makers weigh under 7 ounces. Instant coffee offers quick extraction and minimal cleanup. For thru-hiking, a mix works well, instant for high-mileage days, specialty brew bags for camp days. The trade-off is personal: instant saves 2-3 minutes and eliminates grounds disposal, while fresh-ground offers superior flavor and full-immersion extraction.

댓글 남기기
이 사이트는 hCaptcha에 의해 보호되며, hCaptcha의 개인 정보 보호 정책 과 서비스 약관 이 적용됩니다.